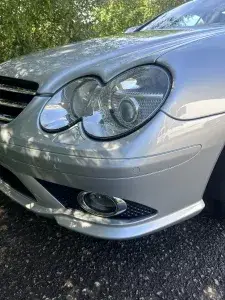
Headlight Restoration: Brighter Nights
Hello Today, we’re diving into a topic that sheds some light on an often neglected aspect of car care – headlight restoration. Your vehicle’s headlights aren’t just functional; they’re a critical safety feature that illuminates your path during night time drives. Over time, these vital components can become cloudy, dull, or hazy, reducing their effectiveness. Fear not; headlight restoration is here to bring back the brilliance and ensure brighter nights on the road.
Why Headlight Restoration Matters
Before we delve into the restoration process, let’s explore why it’s crucial to keep your headlights in top-notch condition:
1. Safety First: Cloudy headlights diminish your visibility at night, reducing your ability to see potential hazards on the road and be seen by other drivers.
2. Enhanced Looks: Restoring your headlights not only improves function but also enhances the overall appearance of your vehicle, making it look well cared-for and more appealing.
3. Cost Savings: Replacing entire headlight assemblies can be expensive. Restoration is a cost effective alternative that can extend the life of your existing headlights.
4. Resale Value: When the time comes to sell your car, clear and bright headlights contribute to a positive first impression and may increase your vehicle’s resale value.
The Headlight Restoration Process
Now that we understand the importance, let’s shine some light on the step-by-step process of headlight restoration:
1. Gather Your Tools and Materials: You’ll need headlight restoration kits available at auto supply shop. These kits typically include sandpaper with various grits, a polishing compound, and protective sealant. You’ll also need clean, dry microfiber towels, painter’s tape, and a spray bottle with water.
2. Masking: To protect the surrounding paint, use painter’s tape to mask off the area around the headlights. Ensure a tight seal to prevent damage to the paintwork.
3. Wet Sanding: Start with the lowest grit sandpaper from the kit, usually around 400-600 grit. Wet the sandpaper and the headlight’s surface, then sand in a horizontal motion, applying light to moderate pressure. Keep the surface wet and avoid sanding the adjacent areas. Repeat this step with progressively finer sandpapers, working your way up to 2000-3000 grit for a smooth finish.
4. Polishing: Apply the polishing compound from the kit to a clean microfiber towel and buff the headlight’s surface in a circular motion. This step helps remove any remaining cloudiness and fine scratches.
5. Sealing: Using another clean microfiber towel, apply the protective sealant provided in the kit. This seals the headlight’s surface, helping to maintain the clarity achieved during the restoration process.
6. Final Inspection: Remove the painter’s tape and inspect your newly restored headlights. They should be clear, bright, and free from cloudiness or haziness.
7. Recheck Over Time: Headlight restoration can last for several months to a few years, depending on factors like weather conditions and sun exposure. Periodically check your headlights, and if you notice any haziness returning, repeat the restoration process.
In Conclusion
Headlight restoration is a simple yet impactful aspect of car care that ensures your safety and enhances your car’s looks. By investing a little time and effort, you can enjoy brighter nights on the road, improved visibility, and a vehicle that looks well maintained and appealing. So, illuminate your path with confidence and embark on your next nighttime adventure with clarity. Safe driving!


