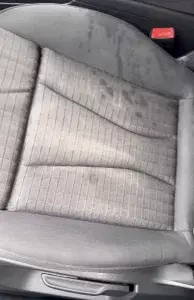
Stain Removal: Erasing Accidents
Today, we’re tackling a topic that all too often plagues our beloved vehicles: stains. Whether it’s a spilled coffee, a dropped ice cream cone, or a muddy paw print, stains can turn our car’s interior from a pristine sanctuary into an eyesore. But fret not! In this comprehensive guide, we’ll delve into the world of stain removal and equip you with the knowledge and techniques to erase accidents and restore your car’s interior to its former glory.
The Stain Dilemma: Unwanted Blemishes
Stains can occur for a multitude of reasons, from everyday mishaps to unforeseen accidents. Here are some common culprits:
- Food and Beverages: Spills of coffee, soda, ketchup, or other food items are frequent offenders.
- Pets: Paw prints, drool, and even the occasional accident can leave stains.
- Mud and Dirt: Walked in by shoes or paws, mud and dirt can create stubborn stains.
- Ink and Dye: Accidental pen marks or spilled ink can be particularly troublesome.
- Grease and Oil: These can occur during car repairs or DIY projects in the vehicle.
Why Stain Removal Matters
Before we delve into the stain removal process, it’s essential to understand why it’s a critical aspect of car care:
Preserve Looks: Stains can be unsightly and diminish the overall appearance of your car’s interior. Removing them enhances the looks and feel of the interior.
Odour Prevention: Lingering stains can foster odours, especially if they involve food or beverages. Proper removal helps keep your car smelling fresh.
Maintain Resale Value: A well-maintained interior, free of stains, contributes to a higher resale value when you decide to part with your vehicle.
The Stain Removal Process
Now, let’s roll up our sleeves and explore the step-by-step process of banishing those pesky stains from your car’s interior:
1. Act Quickly: The sooner you address a stain, the better your chances of complete removal. Promptly blot any liquid spills and gently scrape any solids.
2. Identify the Stain: Determine the nature of the stain—whether it’s water-based (e.g., coffee, juice), oil-based (e.g., grease, ink), or protein-based (e.g., milk, blood). This helps you select the appropriate cleaning agent.
3. Test in an Inconspicuous Area: Before applying any cleaning solution, test it in a hidden area of your car’s interior to ensure it doesn’t cause discoloration or damage.
4. Choose the Right Cleaning Product: Depending on the stain type, use a suitable cleaning product:
- Water-Based Stains: For these, a mixture of mild soap and water or a commercial upholstery cleaner often works.
- Oil-Based Stains: Try an automotive degreaser or a stain-specific cleaner.
- Protein-Based Stains: Enzyme-based cleaners are effective for these stains.
5. Blot, Don’t Rub: When applying the cleaning agent, gently blot the stain with a clean cloth or sponge. Avoid aggressive rubbing, as it can spread the stain.
6. Work from the Outside In: Always start cleaning from the outer edge of the stain and move towards the center. This prevents the stain from spreading further.
7. Rinse and Repeat: After applying the cleaning solution, rinse the area with clean water and blot dry. You may need to repeat the process several times for stubborn stains.
8. Patience Is Key: Stain removal can be a gradual process. Be patient, and don’t rush it. Sometimes, it may take multiple attempts to fully remove the stain.
9. Odour Prevention: If the stain was from a liquid, ensure the area is thoroughly dried to prevent smells.
10. Protect and Prevent: Consider applying a fabric protector or stain repellent to prevent future stains.
In Conclusion
Stain removal is an essential aspect of car interior care. By promptly addressing stains and using the right techniques and cleaning products, you can ensure your car’s interior remains pristine, smell free, and ready to impress. So, the next time an accident happens, remember these stain removal tips and restore your car’s interior to its original looks. Happy driving, stain free!


