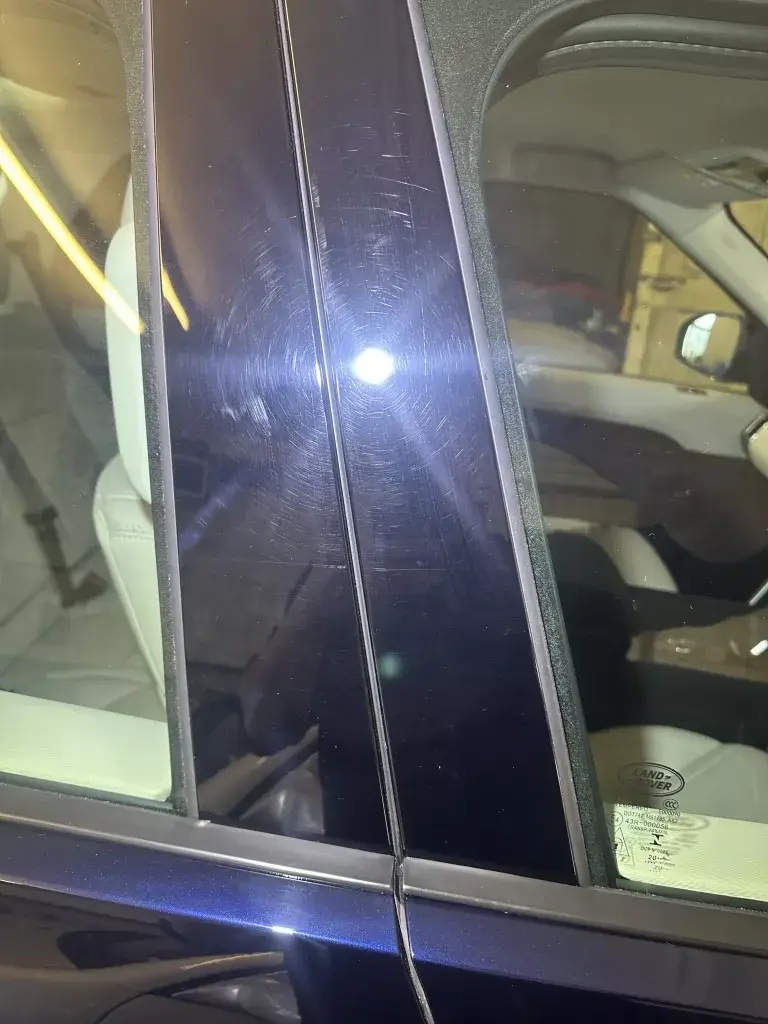
Swirl Mark Removal: Saying Goodbye to Imperfections
We’re about to embark on a journey into the world of car detailing, where we’ll address a common issue that plagues the pristine finish of our beloved vehicles – swirl marks. These fine, circular scratches can dull the brilliance of your car’s paint and leave you yearning for that smooth, flawless surface. But fret not, as we have the tools and techniques to get rid of these imperfections and restore your car’s gloss and shine. Let’s dive into the art of swirl mark removal.
Swirl marks, often visible under certain lighting conditions, can make even the most meticulously maintained car appear less than perfect. These pesky imperfections usually result from improper washing and drying techniques, the use of harsh materials, or simply the wear and tear of daily driving. While they may seem daunting, removing swirl marks is a task well within reach, and the results are truly worth the effort.
Why should you invest your time and energy into removing swirl marks? Here are some compelling reasons:
Restored Aesthetics: Removing swirl marks renews your car’s appearance, bringing back its glossy shine.
Improved Resale Value: A swirl-free finish enhances your car’s resale value, making it more appealing to potential buyers.
Protection: Swirl mark removal often involves waxing or sealing your car afterwards, adding a protective layer that guards against future imperfections.
Satisfaction: Knowing your car looks its best and is free from unsightly blemishes is undeniably satisfying for any car owner.
Now, let’s delve into the steps to remove swirl marks and restore your car’s shine:
You’ll need a few key items, including a high-quality car polish , foam or microfiber pads, a dual-action polisher, and clean microfiber cloths.
Begin with a thorough car wash to remove surface dirt and contaminants. Ensure your car is completely dry before moving on.
You may also want to do a full decontamination on the car with fallout remover and clay bar treatment for the best results.
Examine your car’s paint under different lighting conditions to pinpoint the swirl marks’ locations and severity.
Apply a small amount of polish to your foam or microfiber pad. Work in a small section at a time, using a dual-action polisher work from left to right, up and down in a cross hatch pattern.
Avoid applying excessive pressure.
Periodically stop and wipe away excess product with a clean microfiber cloth. Check your work under different lighting to ensure the swirl marks are diminishing.
Continue this process, section by section, until you’re satisfied with the results. Some deeper swirl marks may require multiple passes.
Swirl mark removal is a transformative process that can lift your car’s appearance and bring back its showroom-worthy shine. With the right products, techniques, and a touch of patience, you can say goodbye to imperfections and embrace the flawless finish you’ve always desired. So, roll up your sleeves, and let’s get to work – saying goodbye to swirl marks is a journey well worth taking. Happy detailing!

