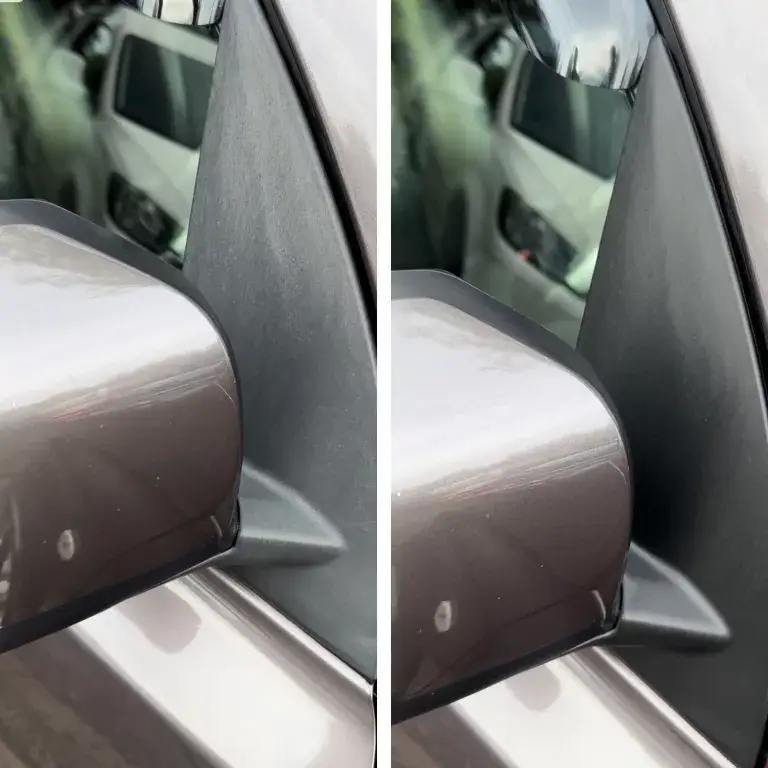
Exterior Trim Restoration: Fixing the Fade
Today, we’re going to be delving into the world of exterior trim restoration, a vital aspect of car maintenance that often goes unnoticed but can make a world of difference in your vehicle’s overall appearance. Say goodbye to faded and weathered trim, and hello to a rejuvenated and stylish exterior.
The Culprit: Faded Exterior Trim
If you’ve ever noticed dull, discoloured, or chalky-looking trim pieces on your car, you’re not alone. The exterior trim, which includes components like window seals, rubber gaskets, plastic mouldings, and even some metal accents, is exposed to the elements day in and day out. Over time, these elements take their toll, causing the once vibrant trim to lose its looks.
Why Exterior Trim Restoration Matters
Before we jump into the restoration process, let’s explore why paying attention to your car’s exterior trim is crucial:
1.Improved Looks: Restoring your exterior trim breathes new life into your vehicle’s appearance, making it look fresh and well-maintained.
2. Protection: Properly maintained trim not only looks good but also serves its intended purpose, like sealing windows and protecting against leaks.
3. Prevents Further Damage: Faded or damaged trim can deteriorate further if not addressed, potentially leading to more extensive and expensive repairs down the road.
4. Preserves Resale Value: A well kept car with restored trim is more appealing to potential buyers, enhancing its resale value.
The Trim Restoration Process
Now, let’s roll up our sleeves and get to work on restoring your car’s exterior trim to its former glory:
1. Gather Your Supplies: You’ll need a few essentials for this task, including trim restoration products, microfiber towels, an applicator pad, and protective gloves.
2. Clean the Trim: Start by thoroughly cleaning the trim with a mild automotive cleaner and water. Use a brush or cloth to remove dirt, grime, and any residue. Rinse and let it dry completely.
3. Apply the Trim Restorer: Follow the product instructions on your chosen trim restoration product. Typically, you’ll apply it using an applicator pad or a microfiber towel. Ensure an even and thorough application.
4. Rub or Buff: Depending on the product, you may need to gently rub or buff the trim to work in the restorer. Be sure to follow the recommended technique for the best results.
5. Wipe Off Excess: After applying and working in the restorer, use a clean microfiber towel to wipe off any excess product from the trim. This ensures a clean finish.
6. Inspect and Repeat: Check the trim to ensure that it has regained its desired appearance. For severely faded trim, you might need to repeat the process to achieve optimal results.
7. Protect the Trim: Consider applying a protective trim sealant or UV-resistant coating to maintain the restored look and protect against future fading.
8. Final Touches: Once you’re satisfied with the results, stand back and admire your work. Your car’s exterior trim should now look revitalised and vibrant.
In Conclusion
Exterior trim restoration may be an often overlooked aspect of car care, but it’s a small investment that yields significant benefits to looks and protection. By bringing faded trim back to life, you not only enhance your vehicle’s appearance but also ensure that it continues to make a statement on the road. So, don’t let the fade get the best of your trim take action, restore its vibrancy, and keep driving in style. Happy driving!


